Friday, January 30, 2009

Make Your Own Glue Dots

You can make your own glue dots by dropping blobs (any size you like) of Aleene's Tack It Over and Over glue onto parchment paper.I did this and folded the excess waxed paper over top, once they were 'dry'. All I have to do is open up the parchment paper, pick off one of the blobs and use like regular store-bought glue dots.

Here is what a bottle of it looks like at the store and it only costs about $4.

Aleene's Tack It Over & Over 4 oz

Here is a video and detailed instructions to show how it is done from Stampbusters Site that I found on the net.

The Aleene’s Tack-It Over and Over dried almost clear, with a tinge of yellow.  I tried wax paper, freezer paper and parchment paper.  The wax and freezer paper did not release the dots as easily and I had to pick them off with more effort than I would want to put up with.  Parchment paper worked great!

You can make all sizes of glue dots, which is a real bonus of making them yourself.  Using the 1″ strips of parchment paper I cut, I used the glue to ‘draw’ long, skinny dashes for holding ribbon on a stamped project.  I made jumbo dots, itty bitty dots and even little “corners” that looked like an upside down V, perfect for corners of a card!

To store them, I tried 3 methods.  You know how you can buy glue dots on a square piece of paper?  I made some on 4×4  parchment.  I really didn’t like using them off of the sheet as I kept getting them on my knuckles, which was giving my twitches.  I like them on a roll MUCH better!   I cut 1-1/2″ off of an empty paper towel roll and used Scotch tape to fasten it to the roll and piece the strips together.

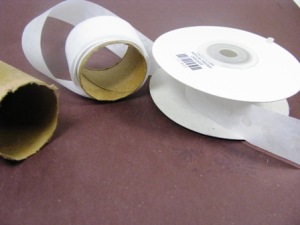
My favorite solution was to use an empty 1″ribbon roll.  It kept the exposed glue dots from landing on things that shouldn’t be glued and there is good amount of depth to roll on lots of dots!

img_2267

Do they hold as well as store bought glue dots? I put them to the test with buttons and wide ribbon.  The homemade glue dots seemed to have a bit more play in them when I tried to wiggle the button but held on well.   Even under a hot light and against gravity, they still held the ribbon to the card.  Note:  Aleene’s glue does not say if it is archival, so I wouldn’t use it for scrapbooking or anything like that.

Would I make more of them?  Actually, I think I might.  Especially for swaps since I can make so many of them so cheaply and in any size I need.  A bottle is around 3 or 4 bucks and I barely made a dent in it to make 500 dots!  Of course they aren’t exactly the same as the store bought, but if you are in a pinch or on a budget, give ‘em a try!

Also the dots can be moved before they 'set' so, if you get a wrong placement, at first, you can pick them off and move them."

The Power of Scrapbooking Friends

Its a new year for me and finally things are starting to to turn around in my scrapbooking and rubber stamping world. As many of you may or may not know, I went through a tough end of the year with my newly adopted twin 8 year old boys. Their adoption was to finalize on December 11, 2008 and just about 3 weeks prior my boys started the process of trying to push us away. They started acting up in school, melting down, crying and everything from punching to rage as they knew their adoption finalization was coming soon. They had been in this same place over the last couple of times they were placed in a foster home to be adopted and were worried that we would not adopt them. They were trying to push us away to see if we would. But we stood our ground and endured through it all with tears and frustration.

As many of you know I started scrapbooking and stamping as a way to build a heritage for my boys because they were adopted from an orphanage where they had been since age 2. During all this time, I total lost touch with my scrapbooking friends especially those on Fiskateers.com. I felt so down over all the issues that we were going through. But it was the power and friendships of each one of my scrapbooking friends that in the end help me get through it all. I was shown how my true friends were and as it was all about to finish packages starting arriving with Random acts of Kindness from friends. Many of my friends kicked into gear and I was not alone, fiskateers rock!!!! I know many may think scrapbookers and papercrafters are a bunch of women who waste time and just like to get together eat and gossip. Well I stand to tell you they are not.They are loving and supportive beyond everyone I know even my church.

Thanks all for what you do and have done. I look forward to being able to pass along this great empowerment you have given and the acceptance I get in this all girl world as a guy

Wednesday, January 14, 2009

A Cake Recipe for every Crop

Hey all, I figured this week that I would change up the pace and share another love I have, the love for cooking. As we have gotten through the holidays and into the new year with our resolutions, we have valentine's day coming. We have calendars packed with upcoming crops and we wonder what can we make for these that everyone will like. I tasted this recipe recently at family get together where one on my in-laws Tom made for dessert. This cake was so moist and rich that you could barely eat a small piece. It was great so I wanted to start off sharing a recipe with you for it. I hope you like it and please feel free to share it with everyone. I hope to put more recipes on my blog in the future. Let me know what you think. Leave me a comment

Decadent Jam Cake

4 cups flour 6 eggs separated
1 cup butter 2 tsp. baking soda
1/2 cup Crisco 1 tsp. cinnamon
2 cups sugar 1 tsp. nutmeg
1 cup buttermilk 1 tsp. allspice

2 cups blackberry jam
1 cup strawberry jam
1 cup pineapple jam or crushed pineapple
1 cup nuts

Mix all ingredients as listed, using egg yolks first. Mix well and then fold in egg whites. Bake at 350 degrees. Makes 4 or 5 layers.

Buttermilk frosting
1 1/2 cup sugar 1/2 tsp. baking soda
1 stick butter 1/2 cup buttermilk

Cook to soft ball stage, beat until thick enough to spread. YUM

I didn't use pineapple and instead used 2 cups strawberry jam.

Wednesday, January 7, 2009

Etching with Cricut

Okay all, I post recently about etching with the Cricut machine. There is one thing I have found to be a problem and that is materials costs. So i have looked for a way to bring the cost down to practically nothing. First of all lets go over materials needed for etching that you will have to buy in addition to everyday regular supplies. These would be Etching Cream, Vinyl, and Transfer tape.

Etching Cream:
Lets just all say it. Armour Etch is really expensive but a little bit goes a long way. It runs about $10 for a real small bottle, and about $25 for a large bottle. To get this cheap, use your Micheals, AC Moore, Hobby Lobby, or Joann's Coupon.

Vinyl: (Use Can use Contact Paper):
Yes you see it, you can cut cheap contact paper on your cricut machine instead of using expensive vinyl. You can buy contact paper cheap at big lots or Walmart. Doesn't matter what contact paper looks like as you are using it as template. Just lay on your Cricut Mat, don't remove adhesive backing.

Vinyl is another solution that is used. I found a great deal ther other day with product sold at Lowe's called Wall Pops. Wallpops is vinyl that comes in packs of 5 sheet or rolls of 15 feet. It is the same stuff as vinyl and costs only $3.00 a pack. FYI: They are clearance so selection will be limited. If you can't get to Lowe's, a great place online to look for Vinyl is Printonit.com. They run really good deals on vinyl that is compatible with Cricut machines.

Let me know if you know of any other cheap ways to get these supplies.

Cricut: A Machine for everything

Hey all, welcome to the new year 2009!! I am hoping that everyone will have a great year and that our economy will do a turn around. As many of you may have done, I finally broke down and bought the Cricut Expression for Christmas. I got a wonderful deal on this machine on Black Friday and after all was said and done, I paid $150 for it with 2 great cartridges.

Cricut machines are a must have for anyone out there that scrapbooks, stamps, or paper crafts. They currently have 2 different models available: the baby Cricut a.k.a babybug (Oldest), Expression (12x12), and the Create (a mix between the baby Cricut with features of the Expression). These machines have become so versatile over the years that you now practically cut anything with them and there are tons of things you can do with them. One thing to note is that all the cartridges and software is compatible with all the machines and most of the all of the accessories with exception of mats work with all them too.

You can do paper cutting, chipboard cutting, fabric cutting, vinyl cutting, make your own stamps, and etching. Etching has become my favorite new thing to do with the machine. All you need is a machine, a favorite cartridge, vinyl or contact paper, a cutting mat, and a bottle of Armour Etch which you can buy at any hobby store.

Here is a quick tutorial for etching with any Cricut machine:

Step 1: Gather supplies. You will need something glass (Christmas ornament for the this tutorial), glass etching cream (Armour Etch), your Cricut machine , a cartridge of choice, a vinyl scrap or contact paper, a paint brush, and a paper towel. You will also need to be near a water source.

clip_image001

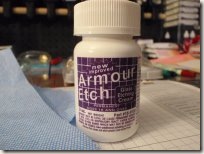
Here is the etching cream that you will use for this project. DO NOT TOUCH THE CREAM!!!!

clip_image002

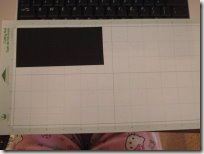
Step 2: Put your vinyl scrap on your mat and cut your stencil as you would cut anything on your cricut machine.

clip_image003

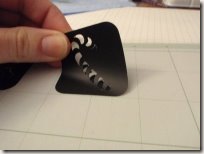
Step 3: Remove your stencil from the Cricut. You would use what is normally left after cutting and taking the shape out - stuff you often throw away. This is called the negative of image.

clip_image004 

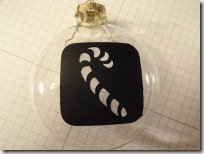
Step 4: Remove the backing on the vinyl and apply to the ornament (or whatever your glass is). Note: if you are using lots of individual letters. You will want to lay them down on flat surface, arrange them how you want them, and lay down a piece of transfer tape over the layout to keep them in place. Transfer tape will also allow you to position your cut items on the wall in the exact place you need them.

clip_image005

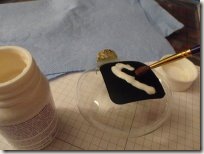
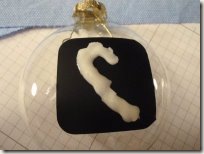
Step 5: Coat the open areas of your stencil with a thick coat of the etching cream. Be careful not to get the cream in any place you don't desire etching to occur.

clip_image006

Step 6: Wait. With this etching cream, you have to wait for at least 60 seconds.

Step 7: Rinse with water. Just take your project and hold it under a running faucet. Again let me repeat ... DO NOT TOUCH THE CREAM. You may want to 'help' the cream off of the ornament..... Don't do that. Just keep rinsing it until the cream is all off of the project and stencil. You may not notice the etching at this time. The area that you etched may look like it's covered with plastic wrap or something. It looks odd .... but it's just fine. :)
clip_image007

Step 8: Wipe it off with a cloth and take off the stencil. You will start to see the etching at this point.

Step 9: You can lay your stencil on something slick like glossy photo paper to reuse it if you can take it off with tearing it. Allow the Armour Etch to dry for 10 minutes and finally enjoy your finished product!


I hope you enjoy this machine as much as I do. Please let me know what you think and if you own one yourself. Thanks to the Shellspot blog for resource pictures.